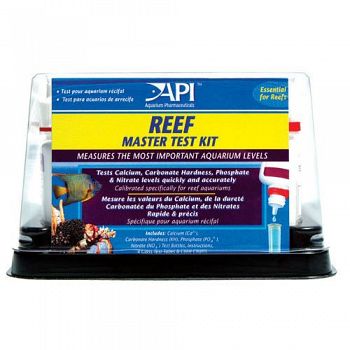
Reef Master Test Kit
Enter the quantity below and click "add to cart":
Category(s):
- Aquarium Water Test Kits - Marine and Reef Water Maintenance
Manufacturer: AQUARIUM PHARMACEUTICAL
Reef aquariums have far more strict requirements than the average saltwater or freshwater aquarium. This Reef Master Test Kit measures those vital levels that many other kits do not include. Accurately monitor calcium, carbonate hardness, phosphate and nitrate levels to keep your reef thriving and beautiful.
Calcium
Rinse a clean test tube with the water being tested.
Fill the test tube to the line with 5 ml of aquarium water.
Holding the bottle vertically, add 10 drops of test solution #1 to the test
tube, then cap and shake for 10 seconds.
Shake test solution #2 vigorously for 10 seconds.
Holding bottle vertically, add test solution #2, drop by drop to the test tube
until the solution changes from pink to the blue end-point.
Cap and shake the test tube between drops.
Be sure to the count the drops.
Each drop is equivalent to 20 mg/L (ppm) calcium.
A pink color should form after the first drop.
If a blue color forms after the first drop, the calcium concentration is 20 mg/L
or below.
As the end-point is approached, the color will usually change from pink to
purple before finally changing to blue.
After the purple color forms, only 1-2 more drops should be required to reach
the blue end-point.
KH:
Rinse a clean test tube with the water being tested.
Fill the test tube to the line with 5 ml of aquarium water.
Add test solution, 1 drop at a time, holding dropper bottle upside down in a
completely vertical position to assure uniformity of drops.
After first drop is added, the solution will turn pale blue.
If the water sample contains 1 dKH or less, the solution will turn from clear to
pale yellow after the first drop is added.
Cap the test tube and invert several times after each drop.
Be sure to the count the drops.
Do not hold finger over open end of the tube, as this may affect the test
results.
The test is completed when the water in the test tube, after having been shaken,
turns from blue to yellow.
If you have difficulty discerning the color after the first drop to test
solution is added, remove the cap from the test tube and while holding it over a
white background look down through the tube.
The carbonate hardness value is determined by the number of drops of th reagent
that must be added to turn the water in the test tube bright yellow.
Each drop is equal to 1 dKH or 17.9 ppm KH.
Phosphate:
Rinse a clean test tube with the water being tested.
Fill the test tube to the line with 5 ml of aquarium water.
Add 6 drops from bottle #1 to the test tube, holding the dropper bottle upside
down in a completely vertical position to assure uniformity of drops added to
the water sample.
Cap and shake test tube vigorously for 5 seconds.
Add 6 drops from bottle #2 to the test tube, holding the dropper bottle upside
down in a completely vertical position to assure uniformity of drops added to
the water sample.
Bottle #2 has a very thick solution and may require increased pressure while
squeezing to release drops.
Cap and shake the test tube vigorously for 5 seconds.
Wait 3 minutes for full color to develop.
After waiting, read the test results by matching the solution against the color
chart.
The tube should be viewed against the white area beside the color chart.
Color comparisons are best made in a well-lit area.
The nearest match indicates the ppm of total phosphate in the water sample.
Rinse the test tube with clean water after use.
Nitrate:
Rinse a clean test tube with the water being tested.
Fill the test tube to the line with 5 ml of aquarium water.
Add 10 drops of test solution #1, holding the dropper bottle upside down in a
completely vertical position to assure uniformity of drops added to the water
sample.
Cap the test tube and invert tube several times to mix solution.
Do not hold finger over open end of the tube, as this may affect the test
solution.
Vigorously shake the solution bottle #2 for at least 30 seconds.
This step is extremely important to insure accuracy of test results.
Now add 10 drops of solution #2, holding the dropper bottle upside down in a
completely vertical position to assure uniformity
Added or Last Modified: 5/7/2013
Weight: 1.2100
UPC: 317163134023
Reef Master Test Kit Additional information:
Measures the most important aquarium levels.Tests calcium, carbonate hardness, phosphate and nitrate levels quickly and accurately.
Calibrated specifically for reef aquariums.
Material Composition or Ingredients (if applicable):
Includes Calcium, Carbonate Hardness, Phosphate, Nitrate Test Bottles, Instructions, 4 Glass Test Tubes And Color Charts.
Continental US shipping costs: 10.99 (We do not charge handling)
Buy Reef Master Test Kit and add $74.41 more to your cart to qualify for free shipping. *Weight restrictions may apply.
We will process your order the day we receive it.
This product usually leaves our warehouse the Next Business Day.
You will normally get your order in 3 - 7 business days (depending on how far you are from the warehouse).
Shipping rates are calculated based on:
- Total weight of the products in your cart.
- Individual item shipping carrier fee ( if applicable )

No reviews yet. Be the first to add a rating!
People who viewed this also viewed:
More options:
Copyright 1999-2025 GregRobert Enterprises, LLC.
Family Owned / Family Values


